

Base Color and Initial Shading
| | Create a new layer between the background and your lineart layer. I usually prefer to start with the skin, but technically you could start with anything you wanted. There's no need to be precise at this point. Even though I work with a Wacom, for right now I turn off the pressure sensitivity and color in the areas of the drawing that would be part of the skin with a hard-edged airbrush set at 100% opacity. Don't worry about areas like the eyes and eyebrows - those will be covered later in the tutorial. If you're worried about small details, especially around hair or jewelry, err on the side of covering too much rather than too little. It's easy to go back in and erase if you need to, and other layers will cover areas of the skin anyway. |
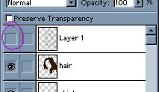
   | Repeat the process, creating a new layer for the hair. Because hair is often full of tiny details, it can help to first block out the biggest areas with a large brush, then zoom in to 100% or even 200% to use progressively smaller brushes to fill it in. The more detail you get at this point, the easier later steps will be, so don't try to rush through. |
 | Finished with the dark layers that required a high contrast to see all the necessary details, I use the Paint Bucket tool to fill in the background with a nice, blue-greenish grey. Having a background color helps to reduce eye strain and makes shading and highlighting easier because you can see the colors better without the glare of pure white. I almost always pick a cooler grey, but sometimes beige or a lighter, but higher saturation pastel makes a good choice. It really depends on the mood and content of your picture. Circled in purple you can see an area where it becomes obvious that the flesh color extends beyond the lines that wasn't so obvious when the background was white. Zoom in to any flaws like these you see and clean them up. Now that you have a darker background to work on, you can continue with any layers that need to be lighter, such as the shirt in this case. Depending on how complicated your drawing is, you can have a huge number of layers - skin, hair, different jewelry, coat, shirt, pants, shoes, buckles... There's very little limitation. I would recommend a new layer for any distinct area, and especially for details that you'll have to zoom in to considerably to fill accurately. |
  | Create a new layer above your skin layer, then bring down the menu and select Group with Previous. Usually I use the shortcut for this, which is Ctrl + G. Here is where having a well filled in area benefits you the most. Grouping this layer with the one under it means that anything you paint on this one will only extend as far as pixels are filled on the skin layer. This makes shading a lot easier and more precise. In essence, you can't color outside your own lines now. You may find that as you apply shading here that you've missed some of the skin underneath. If this happens, simply reselect the base skin color, move down to the original skin layer, fill in the flaw, and then move back up to the shade layer to continue on with that. At this point I am still using a hard-edged airbrush at 100% opacity with pressure sensitivity turned off. If you already have lines for shading on your drawing, apply the shading as planned. If not, you'll need to pick a light source and shade accordingly. I've chosen a source slightly above and to the left. For the shadows themselves, I picked a darker version of the skin color. It's important to note that the shadows are darker, but not greyed out! If you make your shadow colors too grey at this point, later parts of the tutorial will not work as well as they should. |
 |   | Using the same method of creating new layers and grouping them with the previous ones, I've added two additional layers of shading in progressively darker tones and one layer of highlighting. Because subtlety is starting to become a factor, I've checked off the "Pressure" option for the stylus on the Airbrush menu, but I'm still using it at 100% opacity. My colored pieces tend to include heavy shadow, so if you're going for a similar effect don't be afraid to really emphasize the darkness where it needs to be. Also, even at this stage make sure that where there need to be well defined shadows, such as around the nose, that you keep them clean. The human face has an incredible variety of curves to it that will be different for each figure. I can only recommend a combination of life drawing, closely studying anyone who will sit still long enough for you to look at them longer than anyone is comfortable with, and keeping a large folder (physical or digital) full of facial references in all types of lighting situations. Guys, or anyone else who has problems drawing breasts, remember that very few women will form natural cleavage that's just a line without an Iron-Grip® bra. Put some shading between them, please. |
  |  | With the skin well established, it is a good time to use a few tricks to check the progress of your painting. The first one is to make the lineart invisible. To do that, simply click on the little eye next to the layer it's on. When you want it back, click on the empty space again and it should reappear. In my normal style, I count on the lineart more as a guideline for shadow and light than something that should be a major element in the finished piece, so even with that layer made invisible, the shading and highlighting should make for a very solid piece. If it doesn't, something needs to be changed. Depending on your style, this step may be of more or less use to you. The second trick is to flip the canvas horizontally. This is accomplished by bringing down the menu, then and selecting Flip Horizontal. This one is especially useful if you're working with an all digital image. It forces you to look at your painting in a whole new light - checking for balance and proprotional inconsistencies. During the course of a normal painting, I'll flip the canvas several times, but for this one I only did it once due to its simplicity and the fact that I'd checked the drawing on a mini light desk before I scanned it in. If you find that there are things that need to be changed, you can work on them in this horizontally flipped state until they look right. Occasionally you might find that a drawing or painting looks better when it's flipped. If that happens, it's really up to you whether you want to keep it that way. Some people might be overjoyed, but others might consider it "cheating". As for myself, I have no problem with it - it's just another tool at your disposal. Return the painting to its normal direction and continue on with other layers once you're finished correcting it. |
   | The methods I use for dealing with dark and light hair vary considerably. The lighter the hair, the more complicated it tends to be. Sometimes I'll use twenty or more layers alone on light blonde hair to get it to the point where I'm finally satisfied. Darker brown and black hair I don't fuss over nearly as much, but because they are so dark it can cause problems working on them. No matter how dark hair is, it will have shadows that are darker still. Black hair will shade either from a brown-black or a blue-black when I first block it in. To get good visibility of the hair details from your drawing when working with a darker shade, first make a new layer and group it, then use the Paint Bucket tool to flood it with a lighter color. Now you can actually see what you're working on. Pick your shade color for the hair and paint in where it needs to be on a new layer. For this step, I've chosen a different brush comprised of many small specks and lowered the opacity to 45%. Just like the skin, you can use as many layers of shading as you like. After you're finished with the shading, delete the layer you flooded with the lighter color in the first step and create another one on top to add your highlights. For most characters I would add quite a bit more highlighting than this, but Janet's is very dark and has that subtle "fresh from the psych ward" sheen. |
All images are © 2003 to Julia Lichty. Do not use or distribute these pictures without permission.
« back ¶ email